
This smart contract programming tutorial will teach you how to incorporate existing smart contract functionality into your dapps. Thanks to wagmi and Moralis – the tools we use in this tutorial – your dapp will be able to trigger “read” and “write” Web3 contract methods or functions. The following snippets of code will do all the heavy lifting:
To run “read” smart contract functions:const response = await Moralis.EvmApi.utils.runContractFunction({
abi,
functionName,
address,
chain,
}); To run “write” smart contract functions:const { config } = usePrepareContractWrite({})const { write } = useContractWrite()
Along the way, you’ll also have a chance to learn how to get a wallet’s ERC20 token balance. This is where Moralis’ Ethereum API for tokens will do the trick via the following snippet of code:
const response = await Moralis.EvmApi.token.getWalletTokenBalances({
address,
chain,
});
If you’re already a proficient developer familiar with Moralis, go ahead and implement the above code snippets right away! If not, make sure to complete today’s smart contract programming tutorial and level up your game. Just create your free Moralis account and follow our lead!
Overview
The core of today’s article will be our smart contract programming tutorial. The latter will consist of two sub-tutorials – one teaching you to run “read” smart contract functions and the other to run “write” functions. If you’d like to begin the tutorial right away, click here.
For today’s tutorial, your JavaScript (NodeJS and ReactJS) proficiency will get you to the finish line. Keep in mind that we’ll provide you with the primary lines of code herein and links to the complete code that awaits you on GitHub. Consequently, we’ve ensured that there are no obstacles in your way and that you can easily complete this smart contract programming tutorial.
After you’ve rolled up your sleeves and successfully completed the tutorial, we’re going to provide you with some basics related to smart contract programming. As such, we’ll explain what smart contracts are and what smart contract programming is. We’ll also list the leading smart contract programming languages in case some of you want to start creating your own smart contracts.
If you’d like to expand your skills even further after today, make sure to check out Moralis Academy and enroll in the Ethereum Smart Contract Programming 101 course!
Smart Contract Programming Tutorial
As you proceed, you’ll have an opportunity to complete two sub-tutorials. One will show you how to run smart contract functions from your dapp, and the other how to write them. The first sub-tutorial will focus on completing the task within your terminal, without actually creating a frontend dapp. However, the second smart contract programming tutorial will also show you how to create a simple frontend dapp. Here’s the gist of that dapp:

The above screenshot shows that the dapp you’ll have a chance to build in the second sub-tutorial enables users to connect their wallets. Once users connect their wallets, they get to send their Chainlink (LINK) tokens by entering the amount and pasting a recipient address:

In order to incorporate existing smart contracts in dapps, you also want to learn how to explore their details. This is where blockchain explorers enter the picture. Since we’ll be focusing on the Ethereum and Polygon (Mumbai) chains, Etherscan and PolygonScan will do the trick. Fortunately, both of these explorers are quite similar. Essentially, you need to enter a smart contract’s address or project’s/token’s name. Then, you scroll down where you see a menu bar and click on the “Contract” option. By doing so, you’ll get to explore a smart contract’s code, including the ABI (via “Code”), and the contract’s “read” and “write” functions (via “Read Contract” and “Write Contract”):

You must also have your Moralis Web3 API key to complete the upcoming challenges. To get it, make sure to create your free Moralis account. Then, you can access your admin area and obtain your API key:

Run Smart Contract Functions
One of the ways to incorporate smart contracts into dapps is to run smart contract functions. Thanks to Moralis’ “runContractFunction” endpoint, it becomes incredibly straightforward. You just need to create a NodeJS dapp and incorporate the correct endpoint.
Start by creating a “ContractFunctions” folder and open it in Visual Studio Code (VSC). Next, use your terminal to initialize NodeJS by running the following command:
npm init -y
The above command will result in a “package.json” file in your file tree:

Then, install the required dependencies with this command:
npm i moralis dotenv
Also, create your “.env” file, in which you need to paste your above-obtained Web3 API key:
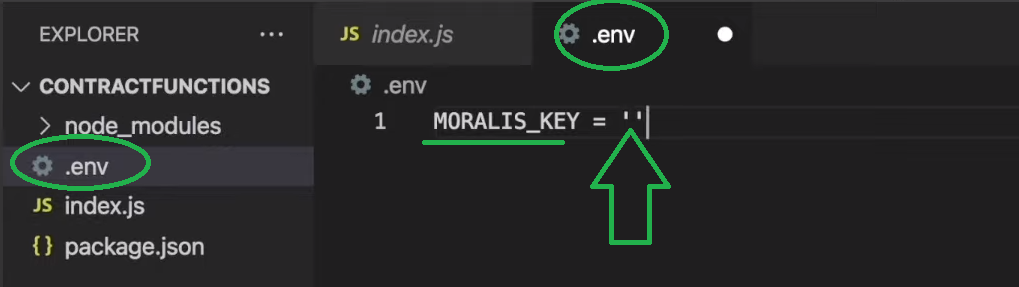
Moving forward, create an “index.js” file. The latter will contain the logic required to complete this smart contract programming tutorial. Open this file, and at the top, import Moralis and require “.env”:
const Moralis = require(“moralis”).default;
require(“dotenv”).config();
Then you need to define the ABI of the smart contract that you want to focus on. We’ll use the “Cool Cats” contract on the Ethereum chain. By using the tips provided in the previous section, you already know how to get any contract’s ABI:
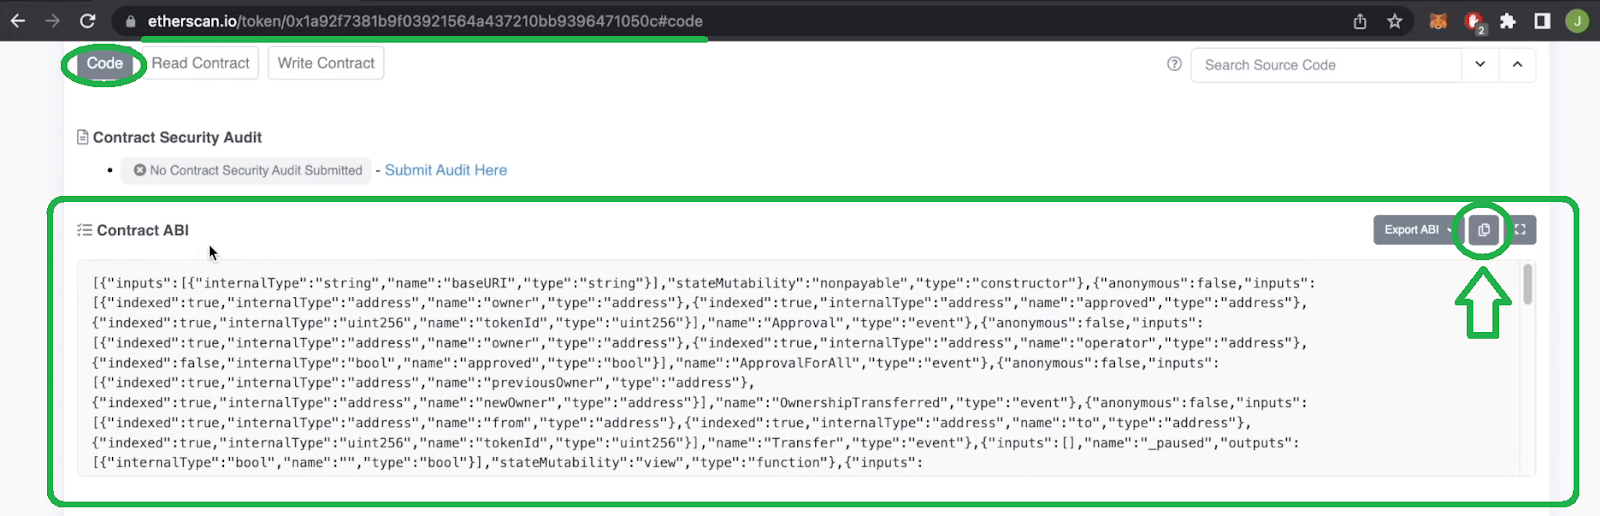
With the ABI copied, return to VSC and create a new “abi.json” file. Open it and paste the contract’s ABI. Next, use “Shift+Option+F” on Mac (or Windows/Linux equivalent) to properly rearrange the content. This contract has several “read” functions; however, we will focus on running “getPrice” with the “runContractFunction” endpoint.
Utilizing the “runContractFunction” Method
Reopen your “index.js” file and require the above-created “abi.json” file:
const ABI = require(“./abi.json”);
You can then initialize Moralis by utilizing your API key and implementing the “Moralis.EvmApi.utils.runContractFunction” method. You also need to use the smart contract’s details as parameters. When focusing on “Cool Cats”, these are the lines of code that do the trick:
Moralis.start({
apiKey: process.env.MORALIS_KEY
}).then(async()=>{
const response = await Moralis.EvmApi.utils.runContractFunction({
address: “0x1A92f7381B9F03921564a437210bB9396471050C”,
functionName: “getPrice”
abi: ABI
});
console.log(response.raw)
})
Finally, you can run your “index.js” script with the following command:
node index.js
If you have followed our lead so far, your terminal should return the following results:

Note: The prices in ETH use 18 decimal places. Hence, the above result indicates that the initial price for the “Cool Cats” NFT was 0.02 ETH.
You can find the video version of this sub-tutorial below. This is also where you can practice running smart contract functions on another “read” function (“tokenURI“). In addition, you can use the video below to learn how to combine the results of running the “getPrice” function with Moralis’ “getNFTLowestPrice” NFT API endpoint.
Write Smart Contract Functions
When running “read” smart contract functions, you do not change the state of the blockchain (you do not execute on-chain transactions). However, when you write smart contract functions, you execute blockchain transactions. Thus, you need to have your MetaMask wallet ready for this smart contract programming tutorial. Moving forward, we’ll focus on an example smart contract dapp that runs on the Polygon testnet (Mumbai). We’ll walk you through the core components of the backend and frontend scripts of our example “Send ChainLink” dapp.
Note: You can find the complete code behind our example dapp on GitHub. There you’ll see the “write” (frontend) and “backend” folders.
With our code cloned, make sure you have the content of the “write” folder in your “frontend” folder. Then, open that folder in VSC and install the required dependencies with this command:
npm i
Inside the “index.js” frontend script, you can see all required functionalities imported at the top, including wagmi:
import React from ‘react’;
import ReactDOM from ‘react-dom/client’;
import ‘./index.css’;
import App from ‘./App’;
import { configureChains, mainnet, WagmiConfig, createClient } from ‘wagmi’
import { publicProvider } from ‘wagmi/providers/public’
import { polygonMumbai } from ‘@wagmi/chains’;
Next, this script enables the Mumbai chain:
const { provider, webSocketProvider } = configureChains(
[mainnet, polygonMumbai],
[publicProvider()],
)
This is where we create a wagmi client:
const client = createClient({
autoConnect: true,
provider,
webSocketProvider,
})
Finally, this script wraps the entire app in “wagmiConfig”:
const root = ReactDOM.createRoot(document.getElementById(‘root’));
root.render(
<WagmiConfig client={client}>
<App />
</WagmiConfig>
);
Implementing the MetaMask Wallet Connector
With the lines of code above, you’ve set up your frontend. Next, you can use wagmi to connect the MetaMask wallet to your dapp inside the “App.js” script. For a detailed code walkthrough, use the video below, starting at 5:03. However, as far as connecting wallet functionality goes, the following “import” lines are a prerequisite:
import { useConnect, useAccount, usePrepareContractWrite, useContractWrite } from “wagmi”;
import { MetaMaskConnector } from “wagmi/connectors/metaMask”;
import { useEffect, useState } from “react”;
The following lines of code inside the “App()” function finalizes the process:
const { address, isConnected } = useAccount();
const { connect } = useConnect({
connector: new MetaMaskConnector(),
});
Getting the Wallet Balance
One of the code snippets from this article’s introduction focuses on getting a wallet balance. To implement this feature, you must use the “backend” folder. In it, you can find the backend “index.js” script (08:15). This script only contains one endpoint: “/getBalance“. At the core of this endpoint is the “Moralis.EvmApi.token.getWalletTokenBalances” method. The latter fetches the connected wallet address via “query.address” for the LINK token (via “tokenAddresses“) on the Mumbai chain (via chain ID). Here are the lines of code for this:
const response = await Moralis.EvmApi.token.getWalletTokenBalances({
address: query.address,
chain: “80001”,
tokenAddresses: [“0x326C977E6efc84E512bB9C30f76E30c160eD06FB”]
})
Just like you did in the above “run” smart contract programming tutorial, you must initialize Moralis with your API key:
Moralis.start({
apiKey: process.env.MORALIS_KEY,
}).then(() => {
app.listen(port, () => {
console.log(`Listening for reqs`);
});
});
Note: Again, make sure to store your key inside your “.env” file.
Do not forget to “cd” into your “backend” folder and install all required dependencies with the “npm i” command. Then, you’ll be able to run your backend dapp with the following command:
node index.js
With your backend running, your frontend (App.js) gets to display the balance with the following “async” function:
async function getBalance() {
const response = await axios.get(“http://localhost:3000/getBalance”, {
params: {
address: address,
},
});
setUserBal(response.data.balance);
}
The script utilizes “useEffect” to call the above “getBalance” function when wallets connect to our dapp. Make sure to open a new terminal for your frontend because you need to keep your backend running. Then, “cd” into your “frontend” folder and run the following command:
npm run start
Note: Use the video below (14:10) to explore how your dapp’s input fields work.
The “write” Function
With the above functionalities in place, we’ve reached the core aspect of this smart contract programming tutorial. This is where we’ll take a closer look at the lines of code that enable your dapp to trigger a smart contract’s “write” functions.
As you might have noticed earlier, the “App.js” script imports “usePrepareContractWrite” and “useContractWrite“. This enables your code to prepare the data and actually trigger the “write” contract functions. Using the video below, starting at 16:00, you can see how we use PolygonScan to get the “ChainLink Token” smart contract details. This includes inspecting all “write” functions this smart contract includes and copying its ABI. You already have the latter ready in the “abi.json” file. Now, since our dapp aims to transfer LINK tokens, we want to focus on the “transfer” function of the “ChainLink Token” contract.
Note: You can learn the purpose of the “useDebounce.js” script in the video below (17:27).
Ultimately, the “App.js” script first prepares the details of the contract we are focusing on by utilizing “usePrepareContractWrite“. Then, it uses “useContractWrite” based on those details. These are the lines of code that enable our example dapp to trigger a “write” smart contract function:
const { config } = usePrepareContractWrite({
address: ‘0x326C977E6efc84E512bB9C30f76E30c160eD06FB’,
abi: ABI,
chainId: 80001,
functionName: ‘transfer(address,uint256)’,
args: [debouncedReceiver, debouncedSendAmount],
enabled: Boolean(debouncedSendAmount)
})
const { write } = useContractWrite(config)
The above “write” function is triggered when users hit the “Send” button:
<button disabled={!write} onClick={()=>write?.()}>Send</button>
Finally, here’s the video that we’ve been referencing in this second sub-tutorial:
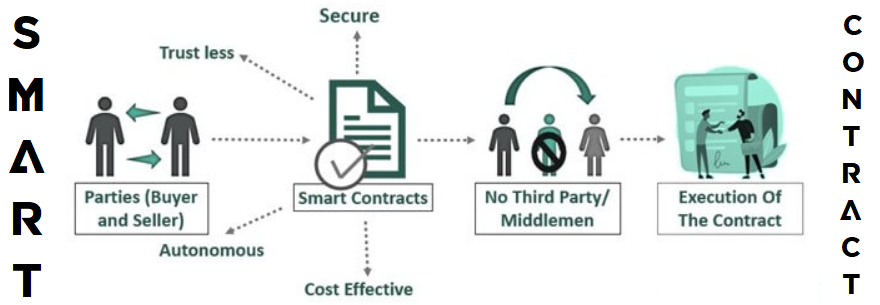
What are Smart Contracts?
Smart contracts are on-chain programs – pieces of software that run on development blockchains (e.g., Ethereum). As such, smart contracts automate and guide on-chain processes. They do so by executing specific predefined actions whenever certain predefined conditions are met. It’s thanks to this automation that these on-chain programs are “smart”. Furthermore, smart contracts are cost-effective, autonomous, trustless, and secure. Plus, the code behind every smart contract is fully transparent – everyone can view it with blockchain explorers.
Thanks to these properties, Web3 contracts have enormous potential to radically change all industries in the upcoming years. They have the power to eliminate intermediaries and make the world more efficient and fair. Of course, that’s the long-term goal. However, Web3 is still in its early stage; therefore, now’s the best time to learn Web3 programming. What better way to do that than to take on a smart contract programming tutorial?

What is Smart Contract Programming?
So, what is smart contract programming? At its core, smart contract programming is the process of writing, compiling, deploying, and verifying smart contracts. However, since the first part – writing a smart contract – is the trickiest, smart contract programming primarily focuses on that task. After all, you can compile, deploy, and verify Web3 contracts with a couple of clicks when using the right tools. On the other hand, writing a proper smart contract from scratch is a rather advanced feat, especially if you aim to implement some original functionalities.
To create a smart contract, you need to be proficient in one of the programming languages for smart contracts. Moreover, there isn’t one universal smart contract language that targets all popular blockchains, at least not yet. Instead, you need to decide which blockchain you want to focus on and then choose among the supported languages for that chain. All in all, if you want to master smart contract programming, you need to be prepared to put in quite some time and effort.
However, to start working with smart contracts is rather simple. For instance, if you want to deploy your smart contract on Ethereum that deals with already known tasks, you can use one of many verified smart contract templates and apply minor tweaks. Then, you can compile, deploy, and verify it with the Remix IDE and MetaMask. Furthermore, you can start incorporating smart contract functionalities into decentralized applications (dapps). A great example of that would be to call a smart contract function from JavaScript. You can use a Web3 JS call contract function or listen to smart contract events using ethers.js.
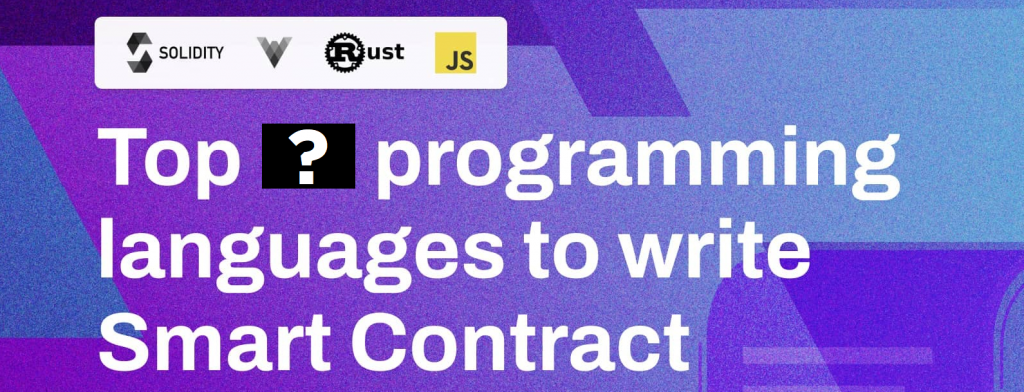
Languages for Smart Contract Programming
Below, you can see the list of the six most popular smart contract coding languages and the leading chains they focus on:
Solidity for Ethereum and other EVM-compatible chainsVyper for Ethereum and other EVM-compatible chainsYul (and Yul+) as an intermediate language for the Solidity compiler Rust for Solana, Polkadot, NEAR, and several other chainsC++ for EOSJavaScript (NodeJS) for Hyperledger Fabric and NEAR
Other note-worthy programming languages that you can use to write smart contracts include Clarity (Bitcoin), Golang/Go (Ethereum), Marlowe (Cardano), Cadence (Flow), LIGO (Tezos), Move (Aptos), TEAL (Algorand), and Python (Hyperledger Fabric).
Note: If you want to learn more details about Solidity, Vyper, and Yul, make sure to use the “programming languages for smart contracts” link above.
When it comes to incorporating smart contract functionalities into dapps, you can use any of your favorite programming languages thanks to Moralis’ cross-platform interoperability.
Smart Contract Programming Tutorial for Blockchain Developers – Summary
In today’s smart contract programming tutorial, we covered quite some ground. You had a chance to follow our lead and complete today’s smart contract programming tutorial. First, you learned to create a NodeJS dapp that runs “read” smart contract functions using the Moralis “runContractFunction” endpoint. And in the second tutorial, you had an opportunity to clone our dapp and use it to trigger “write” smart contract functions. Once we finished the tutorial, we addressed some of the basics. As such, you had a chance to refresh your understanding of smart contracts and smart contract programming. You also learned what the leading smart contract coding languages are.
If you enjoyed today’s tutorial, make sure to dive into Moralis’ docs and tackle the “Tutorials” section. Don’t forget to reinforce your blockchain development knowledge by visiting the Moralis YouTube channel and the Moralis blog. These two outlets cover a wide range of topics. For instance, some of the latest articles will help you understand blockchain-based data storage, how to get contract logs, how to get Ethereum transaction details, and much more. If you want to take on the smart contract programming course mentioned in the “Overview” section, make sure to enroll in Moralis Academy.


 Rebounds 1.12% Despite Major Token Unlock Selling Pressure")


!!! Bitcoin News Today, Ethereum, Solana, XRP & Chainlink")


